Cabinet hardware upgrades: quick kitchen staging wins
Every kitchen we’ve walked through this season has had the same quiet bottleneck. Buyers stop at the island, set down the flyer, and then—almost without thinking—reach for the nearest drawer pull. They open one cabinet, close it, and try another.
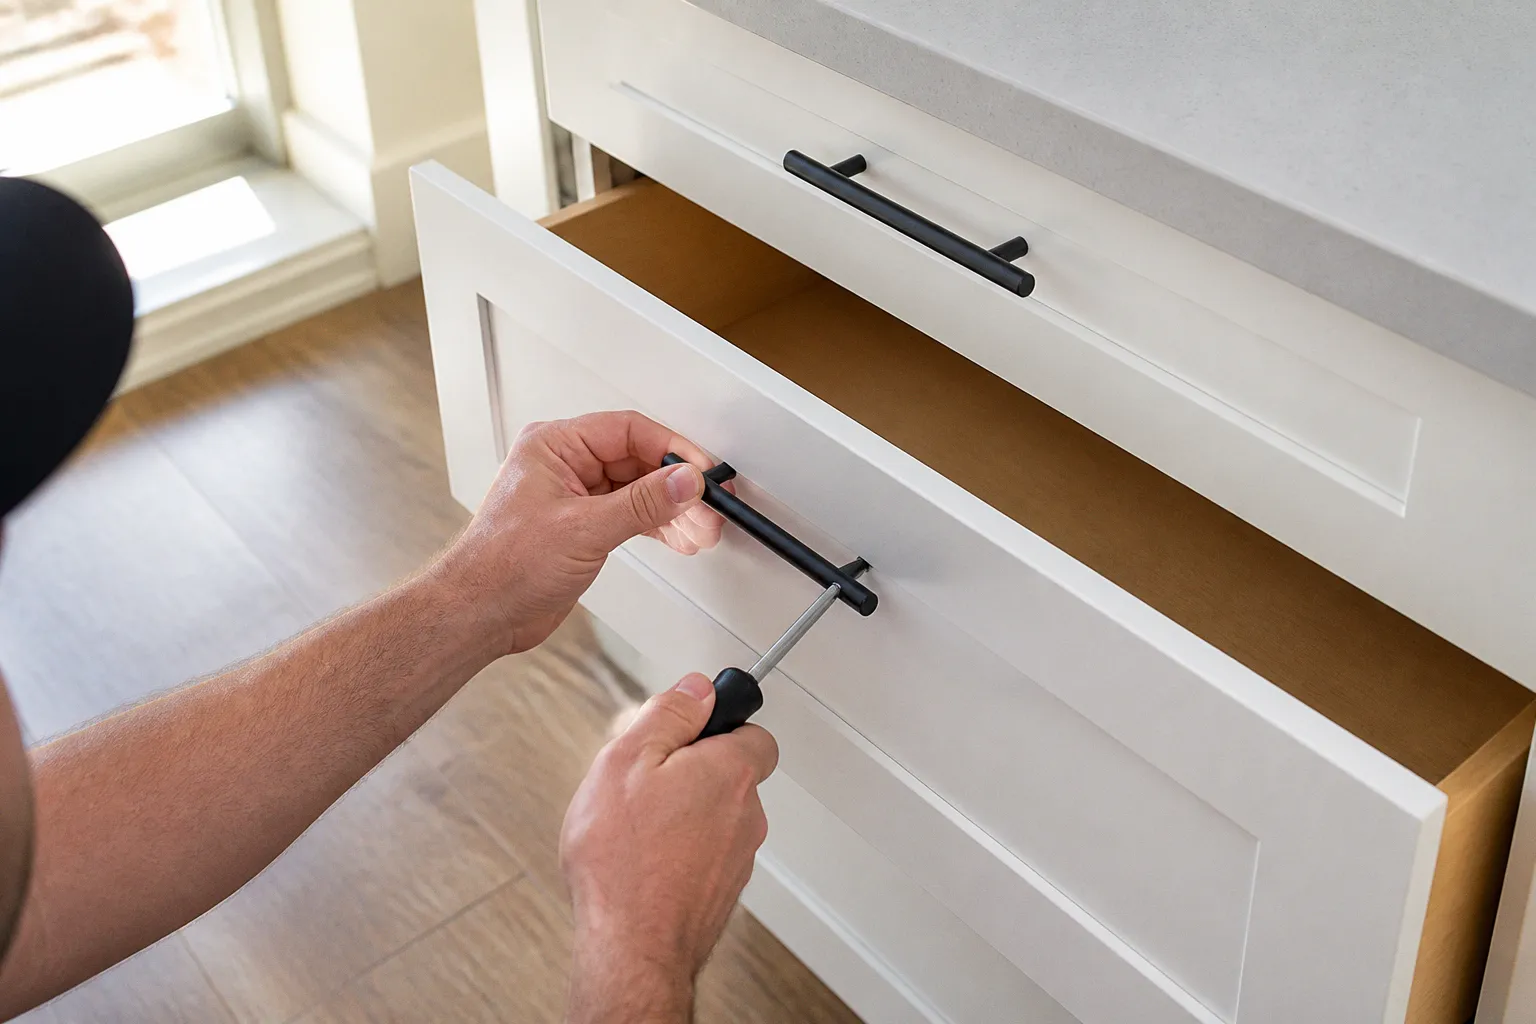
In a market where a listing can turn over in a single weekend and the photo-ready window keeps getting tighter, those few seconds of touch are doing a disproportionate amount of work.
The 2025 Cost vs. Value Report tells the broader story: a minor kitchen remodel recovers 94.4% of its cost at resale, while a major midrange remodel recovers only 44.2%. Within that minor category, the smallest, fastest, most tactile intervention—swapping the cabinet hardware—can be the move that pays back most visibly for the least disruption.
That is the topography of staging at the room scale. Before a buyer reads the square footage on the listing sheet, they are reading the kitchen with their hands. The hardware is the first sentence that sentence tells.
A minor kitchen refresh recoups roughly 94% of its cost at resale, while a major remodel recovers barely half. The hardware swap lives inside that 94%.
The ROI of minor kitchen updates: why hardware matters
Let’s put the numbers on the map so we can see where a cabinet hardware upgrade for home staging actually lives. The 2025 Cost vs. Value Report tracks what sellers recover, project by project, and the split between minor and major kitchen work is the sharpest contrast in the dataset. A minor kitchen remodel—refreshed cabinet surfaces, modern lighting, and updated hardware—returns about $25,669 on a $27,187 investment. A major midrange remodel returns far less in proportional terms because the cost base grows beyond what buyers in a softening patch of the market are prepared to meet.
That distinction matters in Seattle, where a kitchen may need to look cared for and current without being rebuilt from the studs. Buyers are not necessarily asking for a brand-new room. They are asking whether the room appears ready for the next owner, or whether it is quietly handing them a list of projects.
Cabinet surface work is its own smaller zone within a minor remodel. Refacing—replacing doors, drawer fronts, and hardware while keeping the existing cabinet boxes—delivers a 75% to 90% return at roughly half the cost of full replacement. Think of it as repaving the trail rather than regrading the hill: the underlying topography is fine; the surface is what buyers read.
Full cabinet replacement runs $15,000 to $25,000 in most markets; refacing lands closer to $7,000 to $12,000. The hardware line item is the smallest piece of either budget, but it carries unusual visual weight per dollar because every cabinet door and drawer is wearing it.
| Approach | Typical cost band | Reported cost recovery | Time on site |
|---|---|---|---|
| Full cabinet replacement | $15,000–$25,000 | Lower; market-dependent | 2–4 weeks |
| Cabinet refacing plus new hardware | $7,000–$12,000 | 75%–90% | 3–7 days |
| Hardware swap only, DIY | Modest; often well under $500 | Strong visual return per dollar | A weekend |
The table is not an argument for treating every kitchen with the same brush. A cabinet hardware upgrade will not correct swollen boxes, failing drawer slides, water damage, or a layout that makes the room genuinely difficult to use. It is a staging move, not structural repair. But when the cabinets are sound and the finish is simply tired, the hardware is often where the room can change character without a demolition schedule.
For a Seattle seller staring down a listing window, the geography of that decision is straightforward: every day the kitchen is not photo-ready is a day the listing ages. A hardware swap crosses the finish line quickly, and it pairs naturally with the walkable, transit-corridor neighborhoods where so many of our listings live—the kind of homes where a buyer is choosing a daily routine, not just a square footage.
Tactile appeal: why buyers focus on kitchen details
We’ve watched enough walk-throughs to notice the choreography. Buyers enter the kitchen and, within seconds, at least one of them has opened a drawer. Someone tests the faucet. Someone runs a fingertip along a knob. Someone checks whether a pull feels loose before they have consciously decided to inspect it.
This is not idle fidgeting. It is the fastest tactile audit a buyer can perform, and it happens in every price band, from Madrona to Magnolia and from Greenwood to Georgetown. The kitchen is a working room. Buyers want to know how it works, even when they are only there for a few minutes.
The 2024 HomeLight survey of real estate agents surfaces why: 73% of agents name an updated kitchen as the number-one buyer priority in today’s market. Updated does not mean gutted. It means the kitchen reads as current, clean, and well-tended at the level a buyer can feel in five seconds.
Hardware lives exactly at that level. A knob with a clean profile and a finish that is intact, stable, and easy to grip sends a signal that the rest of the kitchen has been cared for. A loose, dated, or mismatched knob sends the opposite signal—and that impression can spread in the buyer’s mind to the hinges, the drawers, the plumbing under the sink, and everything else they cannot yet see.
Buyers open your cabinets before they read your listing. The hardware is the handshake the kitchen offers first.
There is a quieter reason hardware punches above its weight, and it has to do with the rhythm of a home. The kitchen is the most-used room in the house: morning light under the tree canopy outside the window, evening cleanup, the weekend pot of soup, the school-night homework sprawl across the island. Every one of those moments ends with a hand on a pull.
In staging terms, that makes the hardware one of the most frequently touched surfaces in the room. A finish that feels solid under a fingertip during ten daily openings will feel solid during the two or three openings a buyer performs at a showing. The buyer’s hand confirms what the resident already knows: the room is functional, maintained, and pleasant to use.
That is why replacing cabinet knobs before selling can matter even when the change seems almost too small to photograph. Photographs establish the overall impression. Touch confirms it. If the visual story says “fresh” but the first drawer sticks and the nearest knob wobbles, the room has contradicted itself before the showing has really begun.
The same principle applies to cabinet doors that close unevenly, drawer fronts that sit slightly off-center, and pulls that have been replaced one at a time over the years. Buyers may not identify the problem as a hardware issue. They simply register that the room feels unresolved.
Strategic selection: choosing hardware that sells
This is where the work gets specific, because the wrong hardware can flatten everything the numbers above just earned you. A cabinet hardware upgrade for home staging should make the kitchen feel more coherent, not announce the latest design trend.
Three principles guide what we look for when we are walking a kitchen with a seller and deciding what to swap.
Lean neutral without going bland
Homes featuring neutral kitchen choices sell up to 40% faster than properties with bold or highly personalized design choices. Neutral does not mean dull. It means the hardware steps out of the buyer’s way so the rest of the room can speak.
In a Seattle kitchen with long, low-angle winter light and the bright shoulder seasons we get our hopes up about, neutrals also photograph cleanly. Brushed nickel, soft chrome, matte black, and warm satin brass can all work, depending on the cabinet color, countertop, faucet, and flooring.
The decision should begin with the room that is already there:
- Brushed nickel is forgiving with stainless appliances, cooler whites, gray paint, and a range of existing fixtures.
- Soft chrome gives a slightly brighter, cleaner effect but can look too sharp beside warm wood or creamy cabinet paint.
- Matte black creates contrast and can define a pale Shaker kitchen, though it needs to be repeated carefully so it does not look like a collection of isolated black dots.
- Satin brass brings warmth to white, mushroom, or deep green cabinetry, but it should be tested against the lighting and faucet before committing to the whole room.
A finish sample is worth more than a confident guess made from a phone screen. Hold it against the actual cabinet door, not just the backsplash. Look at it in daylight and under the room’s evening lighting. The goal is not to find the finish that wins in a showroom. It is to find the finish that makes the existing kitchen look intentional.
Match the scale to the cabinet
A heavy, oversized pull on a small Shaker drawer looks borrowed. A slim bar pull on a broad drawer front can look accidental. Proportion is one of those details buyers notice without being able to name, which is exactly the kind of detail that earns its keep in a quick kitchen refresh for resale.
As a rule of thumb, drawer pulls should sit at roughly one-third the width of the drawer face. That is not a law, and the cabinet style may call for a different proportion, but it is a useful starting point. Very wide drawers may need longer pulls for comfortable use, while narrow drawers can look crowded if the hardware is too substantial.
Knobs should anchor the upper corner of doors with at least an inch of clearance from the adjacent edge. On a traditional door, the placement may sit slightly differently from a flat-panel or Shaker door. What matters most is consistency. Mark the position of one knob, step back, and use that placement throughout rather than making each door a separate judgment call.
If you are replacing knobs with pulls, do not buy the entire set before testing one. The visual weight changes dramatically, and a pull that looks elegant in a product photograph can dominate a small galley kitchen.
Finish the room in one voice
Mixing three metal finishes across one kitchen may be possible in a carefully designed interior. In a listing that needs to read quickly, it often reads as unresolved. Pick one dominant finish and let it carry the room—on the hardware, faucet, cabinet hinges where visible, and lighting.
A second finish can work if it has a clearly different job. For example, a warmer metal might appear in a small interior detail while the cabinet hardware and plumbing fixtures maintain the primary finish. The eye should understand the hierarchy without having to solve a puzzle.
The same rule applies to style. A polished, ornate knob on a simple modern cabinet can make the door look older rather than more finished. A very industrial pull may fight with a soft, traditional kitchen. Hardware should support the cabinet lines already in place, not compete with them.
Buy one sample before buying the set
This is the least glamorous step and one of the most useful. Order or purchase a single knob or pull and install it on the most visible cabinet. Live with it for a day. Open the drawer. Photograph the room. Check whether the screw length works and whether the pull sits comfortably in the hand.
A sample reveals problems that a product page cannot:
- The finish may read warmer or cooler than expected.
- The projection may be awkward on a narrow walkway.
- The pull may look too small once it is surrounded by the entire cabinet face.
- The supplied screws may not fit the existing door thickness.
- The chosen metal may expose every mismatch in the faucet or light fixture.
One sample prevents a full-kitchen mistake. That is a good return before the first cabinet is even updated.
Beyond the swap: integrating hardware into surface refreshes
A hardware swap does not stand alone, and that is actually the good news. It is the connective tissue of a minor kitchen refresh—the small change that ties the bigger ones together. When we map a Seattle kitchen before listing, we look at hardware as the element that has to harmonize with three other surfaces: the cabinet finish, the lighting, and the backsplash.
If the cabinet boxes are in good shape, a paint refresh plus new hardware is often the strongest dollar-for-dollar move on the board. Refinishing existing cabinet boxes rather than replacing them, then updating doors, drawer fronts, and hardware, can deliver that 75% to 90% return at roughly half the cost of going new.
In Pacific Northwest homes, where cabinetry in mid-century and Craftsman houses is often solid wood under a tired finish, this is especially true. The bones are good; the wardrobe needs updating. A cabinet hardware upgrade can make older wood feel deliberate again, particularly when the finish is cleaned, repaired, or painted with care.
That does not mean every original cabinet should be painted. Good wood grain can be an asset, and covering it may remove more character than it adds. The question is whether the existing finish looks intentional with the rest of the room. If the doors are sound but the knobs are tarnished, start with the knobs. If the hardware is fine but the paint is chipped around every handle, surface preparation may deliver more than a new metal finish.
Lighting is part of the hardware decision
Lighting works hand in glove with cabinet hardware. A dated fluorescent strip over the sink or a leftover dome light in the ceiling can make even new pulls feel stranded. Replacing it with a simple, properly scaled pendant or a clean flush mount in the same metal family as the new knobs ties the room together in a way buyers register as updated without being able to point to a single decision.
Scale matters here too. A large pendant in a narrow kitchen can create a physical obstacle and a visual one. A tiny fixture over a generous island can make the room feel under-furnished. The lighting should clarify the work zones, not compete with the hardware for attention.
Before buying a new fixture, check the ceiling box, switch arrangement, and overall height. A quick staging update should not become an avoidable electrical project. If the existing light is functional and visually quiet, cleaning it and changing the bulbs may be enough.
Let the backsplash support the change
The backsplash is the final layer. If the existing tile is intact and the grout is sound, a thorough clean and a color-matched grout refresh can carry the room without new tile. This is particularly useful when the backsplash already provides a calm background for the new hardware.
If the tile is damaged or visually busy, a simple subway or handmade-look ceramic in a neutral tone is the safer resale choice. The point is not to make the backsplash memorable. It is to give the cabinet finish and hardware a clean field to sit against.
The order of operations matters. We tend to recommend:
1. Repair or refinish the cabinets.
2. Allow the finish to cure completely.
3. Install the new hardware.
4. Update or simplify the lighting.
5. Clean and repair the backsplash.
6. Deep-clean the room and photograph it under both daylight and evening conditions.
This sequence keeps one improvement from undoing another. New hardware installed before cabinet painting will be removed or splattered. A backsplash decision made before the cabinet color is settled may leave the entire palette fighting itself.
Each step is small. The cumulative before-and-after is the kind of change that helps an offer stay focused on the home rather than opening a renegotiation over deferred maintenance.
Executing a high-impact kitchen refresh on a budget
The reason hardware appears on so many Seattle sellers’ pre-listing plans is that it genuinely fits inside a single weekend. The work is straightforward, but the details determine whether the result looks professional or merely new.
Budget for the whole room, not just the product
A typical kitchen’s worth of hardware can be refreshed for a modest sum—often well under $500—depending on the finish, quantity, and source. Big-box and online direct-from-factory options have compressed this market; you no longer need a trade account to find clean, well-made pulls at a reasonable price.
The product price is only part of the budget. Account for:
- Extra screws in the correct length.
- A template or cabinet door jig.
- Wood filler if the hole spacing changes.
- Matching touch-up paint or stain.
- A replacement piece in case one arrives damaged.
- Time for cleaning and repairing the cabinet faces before installation.
Buy a few more pieces than the exact count if the budget allows. A single damaged pull discovered on photography day can force an unnecessary scramble, and finishes may not match perfectly across separate orders.
Gather the right tools
You do not need a workshop. You do need tools that keep the work consistent:
- A drill with a small bit.
- A screwdriver that fits the hardware screws.
- A measuring tape.
- A level.
- Painter’s tape.
- A simple installation template.
- A self-centering bit if new holes are required.
- Wood filler, sandpaper, and touch-up material for abandoned holes.
A scrap of cardboard with the hole pattern marked can work as a template, provided it is cut cleanly and checked against the cabinet before drilling. A commercial cabinet door hole jig is worth the small spend when there are many doors or when the existing hardware pattern needs to change.
The template is not about speed alone. It protects the visual rhythm of the kitchen. A pull that is off by a small amount on one door may be invisible by itself. Several slightly different placements make the whole installation look improvised.
Work one door at a time
Remove one old piece of hardware and bring it to the counter next to the new piece. Confirm the hole spacing before opening the rest of the package. If the holes line up, the swap may be a five-minute job per door once the surfaces are clean.
If the holes do not line up, decide whether the old holes can be reused, hidden, or filled. New pulls often create more flexibility than new knobs, but every unused hole needs to be treated carefully. Fill it with a matching wood filler, let it dry, sand it flush, and touch up the filled spot before installing the new piece.
Do not force a screw that feels too long. It can push through the cabinet face or damage the finish. Do not over-tighten either. The hardware should be secure, but excessive pressure can crack a painted surface or leave a visible indentation around the base.
Respect cure time and moisture
Hardware goes in after cabinet paint has fully cured—at least 48 hours, and longer in damp Pacific Northwest weather. “Dry to the touch” is not the same as fully cured. Installing too soon can leave fingerprints, imprint the hardware base into the finish, or pull paint away from the screw holes.
Give the room enough time to settle before the photographer arrives. Lighting, backsplash touch-ups, and a deep clean of every surface should follow the installation rather than compete with it.
If you do only one thing before the photographer walks in, do the hardware. It is the smallest line item that changes the most photographs.
The final walk-through before photos
Close the laptop, walk the kitchen one more time, and look at it as a buyer would—not as the person who has learned to ignore its small defects. This is the pass that catches the details quietly draining an offer.
1. Read the hardware from across the room. If you can see finish wear, tarnish, or mismatched pieces from several feet away, a buyer will see them too. The goal is a consistent field of detail, not a collection of individual upgrades.
2. Open every drawer and door. Anything that sticks, wobbles, or squeaks is sending a signal you do not want at a showing. Adjust the hinges, tighten the screws, and lubricate the slides where appropriate.
3. Check the hole pattern before you buy. If you are reusing the existing locations, dry-fit one piece of new hardware against an existing door and confirm the spacing. Cabinet hardware is sold by appearance, but installed hardware is governed by measurement.
4. Match the metal family. Hardware, faucet, lighting, and visible hinges should share one finish—or a deliberate two-finish hierarchy with a clear job for each. Accidental mixing makes an otherwise clean refresh look pieced together.
5. Confirm the scale. Pulls at roughly one-third the width of the drawer face are a useful starting point. Knobs need enough edge clearance from corners and adjacent hardware to look balanced and operate comfortably.
6. Respect the cure time. Paint needs at least 48 hours before hardware goes back on, and longer in damp weather. Plan the installation well before the photo appointment rather than treating the final day as a repair window.
7. Photograph the room with the lights on at night. Hardware reads differently under warm bulbs than in daylight. If it disappears in one condition and dominates in the other, reconsider the finish or the lighting.
8. Look out the kitchen window. Buyers will. Whether the view is a tree canopy, an alley, or a neighbor’s fence, make sure the eye lands on a clean, coherent room rather than a competing distraction.
9. Check the touch points. Wipe fingerprints from the new pulls, clean the edges around each base, and make sure no filler, paint, or dust remains in the screw recesses. Small installation debris is especially visible in close listing photos.
10. Step into the adjacent room. The kitchen should connect visually to the dining area, living room, and entry. A hardware finish that looks right inside the kitchen may feel abrupt when seen from the rest of the main floor.
A kitchen that passes this walk-through hands buyers the right first sentence. In a market where listings can turn over in a weekend and the photograph is the curb appeal of the inside of the home, that first sentence matters.
The cabinet hardware upgrade is not a substitute for sound cabinets, a functional layout, or honest repair work. It is something more practical: a small intervention at the exact point where buyers look, touch, and form an opinion. When the room already has good bones, replacing cabinet knobs before selling can make the kitchen feel cleaner, more current, and more ready for the next daily routine.
That is the advantage of this kind of staging. It does not ask the seller to erase the house and start over. It asks the room to speak more clearly.