Kitchen hardware swaps: Quick staging updates on a budget
In a Seattle kitchen, cabinet hardware is a small detail with an outsized visual footprint.
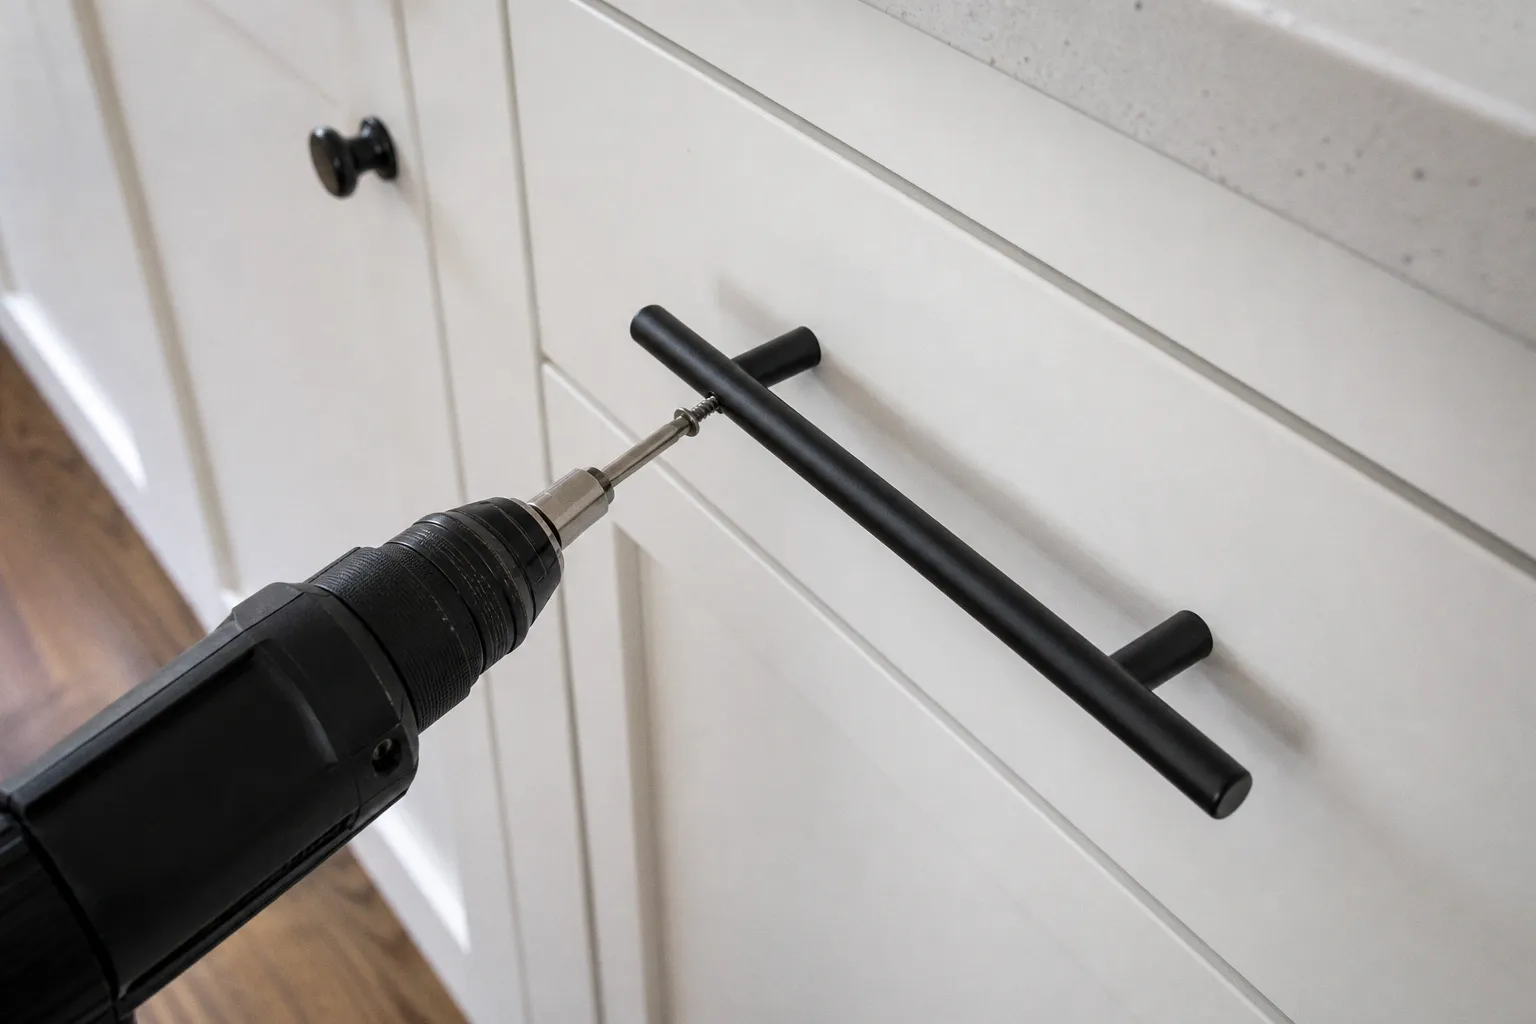
Your hand touches it dozens of times a day, but a buyer notices it almost immediately: the repeated line of pulls across a galley kitchen, the way dark cabinetry meets brushed metal, the faint wobble of a loose knob that tells you the room has been lived in rather than carefully prepared.
That is why kitchen cabinet hardware staging in Seattle can be such a practical pre-sale improvement. A standard kitchen with roughly 15 handles and 20 knobs may be refreshed for about $200 in materials, while a professional hardware installation in the Seattle area can range from approximately $100 to $1,000 depending on the number of pieces, the condition of the cabinets, and whether old holes need to be repaired. It is not a guaranteed increase in appraisal value, and it will not compensate for damaged doors or an awkward layout. But when the cabinetry is fundamentally sound, new hardware can make the entire kitchen feel more intentional.
The best version of this update is not dramatic. It is the quiet feeling that the room has been brought into alignment: clean lines, consistent spacing, a finish that works with the light, and nothing so glossy or ornate that it competes with the rest of the home.
Why a small kitchen update matters in the Pacific Northwest
Seattle homes often ask buyers to read several layers at once. A kitchen may have original oak cabinets, a newer quartz countertop, slate-colored flooring, and the cool northern light that changes considerably from morning to afternoon. In a Ballard bungalow, a compact kitchen may be part of the home’s charm, while in a newer townhouse near a transit corridor, the same room needs to feel efficient and polished enough to justify its footprint.
Hardware helps connect those layers.
A full minor kitchen remodel in the Pacific region, including Washington state, has been reported to produce an average return on investment of 129 percent, with an average project cost of $29,728 and an average recouped value of $38,384. That figure covers a much broader renovation than changing handles and knobs, so it should not be used as a promise for a hardware-only project. Cabinet pulls are a much narrower intervention. Their value lies in the visual lift they create without disturbing countertops, plumbing, appliances, or the cabinet boxes themselves.
This is especially useful when you are preparing a property for photography and showings. Listing images flatten texture and compress space. A dated cabinet knob can read as a dark dot repeated across every door; a mismatched collection of pulls can make a remodeled kitchen appear unfinished. Conversely, a unified hardware arrangement gives the eye a rhythm to follow, much like a continuous canopy makes a Seattle street feel connected from one block to the next.
For sellers, the calculation is less “Will these handles add exactly $X to the sale price?” and more:
- Will the kitchen look cared for in listing photographs?
- Will the room feel more current without losing its character?
- Can the update prevent buyers from mentally adding a small renovation project to their offer?
- Does the hardware make the existing cabinet color and countertop look more deliberate?
That is the right scale of expectation. You are not changing the kitchen’s bones. You are removing a layer of visual friction.
Hardware rarely sells a Seattle home by itself; it helps the rest of the kitchen stop arguing with the buyer.
Start with the kitchen you already have
Before choosing a finish, stand at the kitchen entrance and look at the room as a buyer would see it in the first three seconds. Do not open drawers yet. Notice what catches your eye: the backsplash, the pendant lights, the appliance fronts, the cabinet color, or a row of shiny handles that no longer belongs to the room.
Then move through the space as you normally would. Open the pantry, pull out the waste drawer, test the upper cabinets, and look at the places where the existing hardware has loosened or marked the finish. A kitchen hardware swap works best when it solves both appearance and use.
Cabinet hardware has a few recurring problems:
1. The finish is visibly worn.
Peeling lacquer, cloudy chrome, tarnished brass, and fingerprints that never seem to disappear will show up under real-estate photography lights.
2. The pieces do not belong to the same family.
A mixture of cup pulls, round knobs, long bar pulls, and decorative backplates can feel collected over time rather than designed as one kitchen.
3. The scale is wrong.
Tiny knobs on wide drawers look fussy and underpowered. Very long pulls on narrow doors can dominate the cabinet face.
4. The hardware is loose or crooked.
This is the least glamorous problem and one of the most noticeable in person. A pull that shifts under the hand suggests deferred maintenance.
5. The style belongs to a different renovation era.
High-polished, ornate, or overly stylized hardware can pull a room toward a specific period, even when the cabinets and counters are reasonably current.
If your cabinets are solid but visually tired, replacement is usually the cleanest approach. If the existing pieces have a simple shape and are structurally sound, a careful metal spray-paint refresh may be enough when the budget is tight. The decision should follow the condition of the hardware, not a general desire to make everything look new.
Choosing finishes that sit comfortably in a Seattle home
Seattle buyers do not all want the same kitchen. A restored Craftsman in North Beacon Hill, a mid-century house in Wedgwood, and a compact condo near South Lake Union each carry a different visual vocabulary. Staging should not erase that identity. It should make the home easier to understand.
The safest finishes are generally low-profile and forgiving:
- Brushed nickel works with stainless appliances, cooler stone, white cabinets, and many gray-green paint colors. Its soft reflection is practical in a kitchen that receives strong task lighting.
- Matte black gives definition to pale cabinetry and can echo black window frames, lighting, or range details. It is particularly effective when used consistently rather than scattered as a single accent.
- Brushed brass or muted gold can warm up deep blue, charcoal, and rich black cabinets. Seattle kitchen trends have increasingly paired dark cabinetry with brass-toned hardware for a finish that feels modern without being sterile.
- Bronze can suit warm wood cabinets, earthy tile, and homes with a more traditional or craftsman-like community fabric.
High-polished finishes deserve a more careful look. Glossy chrome or mirror-bright brass can photograph harshly, especially beside reflective appliances or a polished countertop. Staging guidance commonly favors brushed, matte, or otherwise restrained surfaces because they show fewer fingerprints and are less likely to date the room. That does not mean a polished finish is always wrong; it means it should have a clear relationship to the rest of the kitchen rather than being chosen simply because it catches the light in a showroom.
A useful way to narrow the field is to compare the fixed elements first.
| Existing kitchen feature | Hardware direction that usually works | What to watch |
|---|---|---|
| White or light-gray cabinets | Matte black, brushed nickel, muted brass | Black can feel severe if there are no other dark details |
| Deep blue or charcoal cabinets | Brushed brass, antique bronze, matte black | Keep the profile simple so the color remains the focus |
| Natural oak or warm wood | Bronze, aged brass, brushed nickel | Very cool chrome may create an abrupt temperature shift |
| Stainless appliances | Brushed nickel, soft black, understated brass | Match the overall visual temperature, not necessarily every metal exactly |
| Quartz with strong veining | Simple pulls in a quiet finish | Decorative hardware can compete with the countertop pattern |
| Small galley kitchen | Slim bar pulls or modest knobs | Oversized pieces make narrow runs feel crowded |
Take sample pieces home if possible. Place them against the cabinet in the morning, at dusk, and with the overhead lights on. Seattle’s overcast daylight is not a neutral backdrop; it can make cool finishes recede and warm metals become the element that gives the room its welcome.
Mixing knobs and pulls without making the kitchen feel busy
A common staging arrangement is knobs on cabinet doors and pulls on drawers. It is intuitive to use and gives the eye a predictable pattern. You can also use pulls on both doors and drawers for a more contemporary look, particularly in a kitchen with wide drawers and flat-front cabinetry.
What tends to look less successful is mixing finishes without a reason. Two metals can work when one appears in a clear secondary role—for example, black cabinet hardware with brass lighting—but three or four competing finishes make the kitchen feel as though each fixture was selected in isolation.
For a sale, restraint usually photographs better than novelty. Choose one dominant hardware finish, one silhouette, and one proportion that can travel across the entire cabinet run.
The budget ladder: from a full replacement to a careful refresh
A hardware project can be scaled to the condition of the kitchen and the time available before listing. The mistake is not choosing the least expensive option; it is choosing a treatment that looks cheaper than the hardware it replaces.
The $200 materials refresh
For a standard kitchen with approximately 15 handles and 20 knobs, a basic replacement may cost about $200 when handles average around $7 each and knobs around $5 each. Prices vary by material, size, and design, but this gives you a useful starting point for planning.
At this level, spend your attention on consistency. Measure every existing piece before ordering, especially if you are replacing pulls rather than knobs. The distance between screw holes—often called the center-to-center measurement—must match if you want to avoid filling and redrilling the cabinet fronts.
A simple replacement sequence looks like this:
1. Remove one existing piece and record its hole spacing, overall length, and screw length.
2. Photograph the cabinet face with the old hardware removed so you can see whether the previous placement was centered.
3. Order one sample before buying the full set.
4. Test the sample against the cabinet color, backsplash, countertop, and nearby lighting.
5. Replace the full set only after confirming that the hand feel and scale are right.
The sample matters more than a product photograph. A pull can look delicate online and surprisingly bulky on a narrow shaker rail; a knob that seems substantial in your palm can disappear against dark cabinetry.
The professional installation range
Seattle-area professional hardware jobs commonly fall between $100 and $1,000. The wide range reflects the difference between a straightforward swap and a kitchen that requires repairs, drilling, alignment, or removal of dozens of stubborn screws.
Professional installation becomes more valuable when:
- New pulls require different hole spacing from the old ones.
- Existing holes are chipped, enlarged, or poorly positioned.
- The cabinet doors are not level.
- You are changing from knobs to long pulls and need accurate templates.
- The cabinets have delicate veneer or a painted finish that could splinter.
- You are short on time and need the kitchen photographed immediately.
A professional may also help correct a subtle problem that sellers often miss: the hardware is technically centered, but the cabinet doors themselves are not aligned. New pulls cannot fix a crooked door. They can, however, make the misalignment more obvious, so adjust hinges and drawer fronts before the final installation.
The spray-paint option
When the existing hardware has a good shape but an unwanted finish, a neutral metal spray paint can provide a low-cost refresh. This is a useful approach for sellers working with a limited preparation budget, but it is not a one-afternoon shortcut if you want a durable result.
Remove every piece, label where it came from, and clean away grease before painting. Kitchen hardware accumulates cooking oils in its seams and screw holes, and paint applied over that film will chip quickly. Lightly prepare the surface, use a primer compatible with the metal, and apply several thin coats rather than one heavy coat. Allow the pieces to cure fully before reinstalling them; “dry to the touch” is not the same as ready for daily handling.
Spray paint is most convincing when the hardware has a simple profile and the chosen color is forgiving. Matte black, soft bronze, and muted neutral tones tend to conceal small variations better than a bright metallic finish. If the pieces are pitted, badly corroded, or structurally loose, replacement is usually the more honest improvement.
Installation details that separate polished from merely new
A kitchen can have beautiful hardware and still look improvised if the placement is inconsistent. This is where a few inches matter.
For standard knobs on cabinet doors, a common placement is approximately 2.5 to 3 inches from the bottom edge of an upper cabinet door. On base cabinet doors, the visual counterpart is generally measured from the top edge. Drawer knobs are centered horizontally and vertically, while pulls should be aligned across the same plane so the eye reads one continuous line.
These are starting points, not laws. Shaker doors, inset cabinets, slab fronts, and unusually narrow rails may require adjustments. The goal is a placement that feels balanced within the door frame and repeats accurately across the kitchen.
Use a template rather than measuring each cabinet by hand. Even a small variation becomes visible when several pulls sit in a row. A template also protects the cabinet face from the slow accumulation of pencil marks and measuring errors.
A practical sequence for clean installation
- Create a map. Number doors and drawers, particularly if the kitchen has different sizes or unusual corner cabinets.
- Check the cabinet construction. Confirm whether you are drilling through a solid rail, a veneer panel, or a hollow section.
- Mark lightly. Use removable painter’s tape where possible, then mark the drilling points on the tape rather than directly on the finish.
- Drill from the finished side with support behind it. This reduces splintering as the bit exits.
- Install without overtightening. A screw driven too firmly can crush a cabinet face or make a pull sit at an angle.
- Step back after every few pieces. Close the doors and view the run from the kitchen entrance, not only from directly in front of the cabinet.
- Clean the final surface. Remove fingerprints, tape residue, and any pencil marks before photographs.
The most common amateur error is trusting the existing holes without checking the visual center. Earlier hardware may have been installed for convenience, or a previous owner may have replaced one door without matching the rest. If the old placement is noticeably off, changing the hardware is an opportunity to correct the line.
The installation should disappear into the kitchen. Buyers should notice that the room feels composed, not wonder whether every pull is two millimeters out of line.
Match the hardware to the cabinet color—and to the route through the room
The kitchen is not an isolated box. In many Seattle homes, it opens directly into the dining area or living room, with sightlines that extend toward a covered porch, a wall of windows, or a stair landing. Hardware should therefore support the route through the home rather than create a visual stop at the cabinets.
Dark cabinetry is a good example. Deep blue, charcoal gray, and near-black doors can feel rich and architectural, particularly in a room with natural wood floors. Brushed brass introduces warmth and catches the low, soft daylight without the glare of a polished surface. Matte black creates a quieter, more graphic effect and may connect well with black-framed windows or a dark range hood.
White cabinetry offers more flexibility, but that does not mean every finish is equally useful. Brushed nickel keeps the room light and continuous. Matte black adds contrast and can make ordinary shaker doors feel more tailored. Brass warms a kitchen that otherwise leans too cool, especially when the adjacent dining area contains oak, walnut, woven materials, or warm-toned artwork.
With natural wood cabinets, think about undertone. Honey oak, red oak, and walnut each carry different warmth. A gray metal can sharpen the look, while bronze or aged brass will make the room feel more layered. The goal is not to make every element match; it is to keep the temperatures from fighting.
Consider the rest of the home as you make the choice:
- Does the front door have black, bronze, or brass hardware?
- Are the bathroom fixtures visible from the kitchen?
- Do the dining light and cabinet hardware share a shape or finish?
- Is the flooring warm enough to support brass, or does it already have a strong red or orange cast?
- Will the hardware echo details visible in listing photographs from the living room?
This is where neighborhood character can guide rather than dictate the decision. A compact Queen Anne kitchen may benefit from a restrained finish that respects older millwork. A renovated townhouse in a denser corridor may support a more linear, contemporary pull. A North Seattle ranch with broad windows and mature landscaping can carry warmer bronze or brass, particularly when those tones repeat in the entry and dining spaces.
The update should make the property feel coherent from the sidewalk to the sink.
What hardware cannot fix
Cabinet pulls are an efficient staging tool, but they are not a substitute for cleaning, repair, or proportion. Buyers will forgive a kitchen that is modest and well maintained more readily than a kitchen with expensive-looking hardware attached to swollen doors and greasy shelves.
Before purchasing anything, look closely at the cabinet boxes and fronts. If doors are sagging, hinges need adjustment. If drawer faces scrape, the slides need attention. If the finish is peeling or water-damaged near the sink, a hardware change may sharpen the contrast between the new pieces and the underlying problem.
Likewise, do not let hardware distract you from the kitchen’s largest visual issues. A crowded countertop, burnt-out bulbs, yellowed caulk, and a refrigerator covered in notes will outweigh the improvement from even the most carefully selected pulls. Hardware belongs near the end of the staging sequence, after the kitchen has been repaired and edited.
The most effective order is usually:
1. Repair loose doors, drawers, hinges, and slides.
2. Deep-clean cabinet fronts, backsplash, appliances, and floors.
3. Remove excess countertop items so the hardware has visual room.
4. Decide whether the existing hardware should be replaced, refinished, or retained.
5. Install and align the new pieces.
6. Add only the styling that supports the room: one cutting board, a small plant, a bowl of fruit, or a folded linen towel.
That last step matters. Staging is not about filling every surface. A kitchen with clear work areas allows the repeated hardware lines to register, while a kitchen crowded with accessories makes even good updates disappear.
A final walk-through before the listing photos
Once the hardware is installed, leave the room and come back after a few minutes. Approach from the entry, from the living room, and from the path to the back door. This is how buyers will experience the kitchen: in motion, often carrying a conversation, looking at several features at once.
Run your hand across each pull. Check for rough edges, loose screws, and pieces that sit at different angles. Open the drawers that receive the most use. Turn on the under-cabinet lighting if you have it, then check the room again with only natural light. Seattle’s changing daylight can reveal fingerprints and uneven sheen that disappear under warm bulbs.
Before the photographer arrives, make sure:
- Every piece of hardware has the same finish and a deliberate relationship to the others.
- Pulls are aligned across drawers and doors.
- Knobs sit at consistent distances from the cabinet edges.
- Old holes, filled areas, or chipped veneer are not visible.
- The selected finish works with the appliances, lighting, faucet, and adjacent rooms.
- The countertop is edited enough for the hardware to remain legible.
- The cabinet doors and drawers open smoothly.
- No piece feels sharp, loose, oversized, or visually louder than the kitchen itself.
For sellers, this is the practical appeal of updating kitchen hardware to sell a house: the project is contained, measurable, and capable of changing the way an existing room reads without the disruption of a full remodel. A $200 materials budget can create a more current surface impression, while a larger installation budget may be justified when the cabinet layout or old holes demand precision.
The right hardware will not turn a dated kitchen into a new one. It can do something more useful: make a serviceable kitchen look cared for, make a renovated kitchen feel finished, and give buyers one fewer project to add to the mental list they carry from room to room. In Seattle’s close-read property market, that kind of quiet coherence is often where a before-and-after transformation begins.