Seattle basement conversion: A four-phase renovation project
A Seattle basement renovation rarely begins with paint colors or flooring samples.
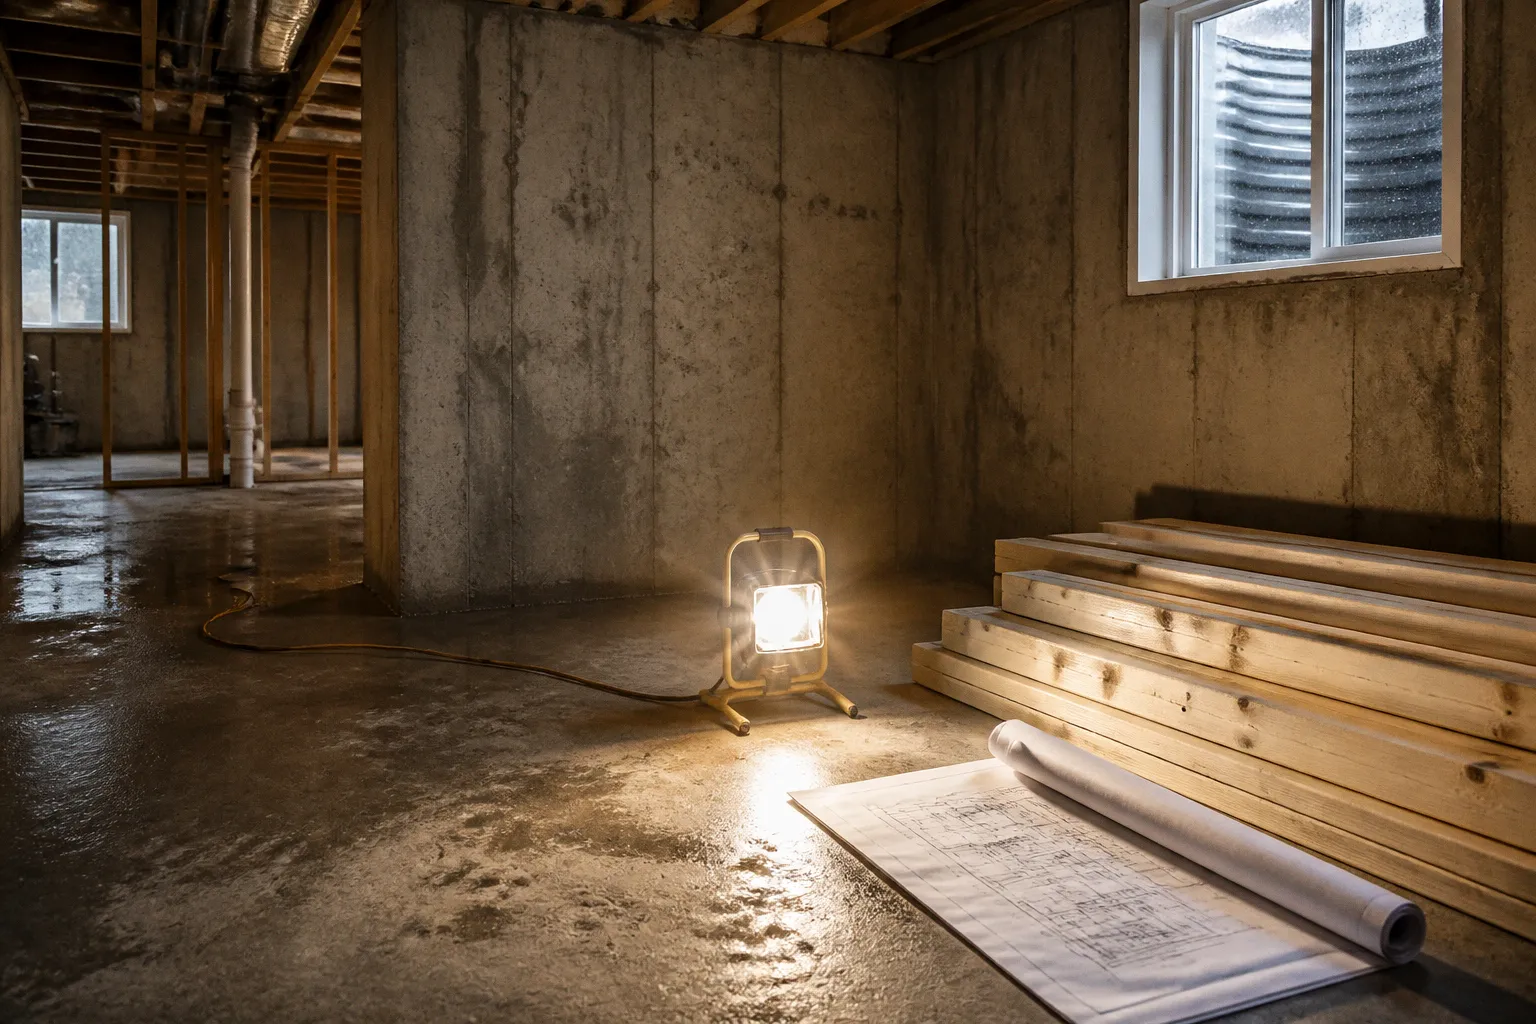
It begins with the ground beneath the house: wet soil pressing against foundation walls, ceiling heights that change from room to room, and the quiet question of whether the existing structure can support the space you want to create.
For an unfinished basement conversion in Seattle, the most expensive surprises tend to appear before the first wall is framed. Moisture mitigation, foundation work, egress, permitting, and ceiling clearance shape the project long before you choose cabinetry or lighting. A successful renovation therefore moves through four connected phases: site feasibility, design and SDCI permitting, structural work, and interior completion.
The sequence matters. If you design a bedroom before confirming that an egress window can be installed, or select finishes before understanding the drainage plan, the basement can become a chain of revisions rather than a calm extension of the home.
In Seattle, the basement is not simply the floor below the living space; it is a room built in conversation with water, soil, slope, and the existing foundation.
Phase 1: Site Feasibility and Moisture Mitigation
The first walk-through should be practical and slightly unromantic. Bring a flashlight, a tape measure, and a willingness to look closely at corners, floor joints, utility penetrations, and the lower edges of the foundation walls. A basement can appear dry during a clear week and still carry evidence of seasonal pressure: staining, efflorescence, peeling coatings, musty pockets, or a faint line where water has previously traveled.
Seattle’s wet climate makes moisture assessment the foundation of the entire renovation. Water does not need to arrive as a dramatic leak to damage a finished room. Persistent vapor, condensation, and hydrostatic pressure can affect insulation, framing, flooring, and indoor air quality over time. Covering the evidence with drywall is not mitigation; it is concealment.
Start with the shape of the water problem
The source and movement of moisture determine the appropriate response. A contractor or building professional may examine:
- Whether water enters through foundation cracks, wall-floor joints, window openings, or plumbing penetrations.
- Whether the site slopes toward or away from the house.
- How roof runoff is collected and discharged.
- Whether exterior drainage is functioning or appears overwhelmed during heavy rain.
- Whether the basement floor shows dampness, staining, or uneven settlement.
- Whether a sump system exists and whether it has a reliable discharge route.
- Whether previous coatings or interior drainage systems are trapping moisture against the foundation.
Depending on the conditions, the project may require exterior perimeter drainage, interior perimeter drainage, vapor barriers, or rigid spray foam insulation applied directly to foundation walls. These are not interchangeable decorative upgrades. Each addresses a different relationship between water, air, and the building envelope.
If the basement is on a Seattle hillside, grading deserves special attention. A sloping lot can create a beautifully layered home, with daylight entering one side of the lower level, but it can also concentrate runoff against a foundation wall. The same topography that gives a basement its potential may be the reason its moisture control needs more engineering.
Measure ceiling height before planning rooms
Ceiling height is another early constraint. Under Seattle Residential Code standards, habitable basement spaces generally require a minimum ceiling height of 7 feet. Bathrooms and laundry rooms may be allowed down to 6 feet 8 inches, but that exception does not turn a low basement into a flexible blank canvas.
Measure in several places, not just at the center of the room. Ductwork, beams, pipes, and localized floor changes can reduce usable clearance. A basement that measures 7 feet at the slab may offer considerably less once flooring, insulation, lighting, and finished ceilings are installed.
This is where the project’s ambition becomes clear. If the existing height is insufficient, a basement dig-out may involve excavating 2 to 3 feet of soil and underpinning or reinforcing the existing foundation. That is a structural operation, not a flooring upgrade, and it can alter the budget, engineering requirements, and construction sequence substantially.
Establish the project’s financial envelope
Seattle basement conversions commonly range from about $105,000 for basic entry-level finishing to more than $400,000 for complex structural work, an ADU, or a high-end custom remodel. The wide span is not a sign that estimates are arbitrary; it reflects the difference between finishing a sound, adequately tall basement and rebuilding the lower level around new foundations, utilities, and legal occupancy requirements.
Soft costs—architecture, engineering, and permitting—may account for roughly 15% to 30% of the project. Older homes also deserve a contingency fund of approximately 15% to 20%, particularly when the original foundation, drainage, wiring, or plumbing is not fully documented.
A useful early budget separates the project into categories rather than assigning one hopeful total:
| Cost area | What it may include | Why it can shift |
|---|---|---|
| Feasibility and design | Site assessment, architectural plans, structural engineering | Existing conditions may require redesign |
| Moisture control | Drainage, vapor barriers, insulation, sump work | Water pressure and site grading vary widely |
| Structural work | Dig-out, underpinning, foundation reinforcement | Low ceilings and older foundations add complexity |
| Permitting and soft costs | SDCI applications, engineering, professional services | Scope and review requirements differ |
| Rough trades | Plumbing, electrical, HVAC, framing | New rooms and bathrooms increase service demands |
| Interior finishes | Drywall, flooring, millwork, paint, fixtures | Finish level and custom work drive the final range |
| Contingency | Unforeseen conditions and field changes | Especially important in pre-1985 homes |
At this stage, you are not trying to make every selection. You are trying to learn whether the home wants a family room, a guest suite, a legal bedroom, a bathroom, an ADU, or a more modest dry storage and utility area—and what the building itself will permit.
Phase 2: Architectural Design and SDCI Permitting
Once the basement has been assessed, the design should translate the physical conditions into a plan for daily life. The best Seattle basement remodels do not treat the lower level as a collection of leftover rooms. They connect it to the routines above: muddy shoes after a walk through the neighborhood, laundry circulation, guest access, children’s play, home working hours, or a quiet retreat away from the street.
That lifestyle map needs to remain grounded in code. Seattle Department of Construction and Inspections, or SDCI, permits are part of the project’s structure, not a final administrative step.
Understand when a permit is required
Seattle requires standard building permits for construction work over $6,500, as well as work that alters structural elements, plumbing, electrical systems, or egress pathways. A basement conversion commonly touches several of those categories at once.
New walls may affect structural or fire-separation conditions. A bathroom requires plumbing. New outlets, lighting, and panels involve electrical work. A bedroom requires a compliant emergency escape and rescue opening. A dig-out changes the relationship between the foundation and the soil. In other words, an apparently simple basement remodel can become a coordinated building project very quickly.
The design package may need to address:
- Existing and proposed floor plans.
- Ceiling heights and finished floor elevations.
- Foundation and structural changes.
- Plumbing fixture locations and drainage routes.
- Electrical layouts and service capacity.
- Heating, ventilation, and insulation.
- Moisture-control assemblies.
- Emergency escape and rescue openings.
- Stair geometry and safe access.
- Any separation required for an ADU or other distinct dwelling arrangement.
Plan review times can vary from weeks to several months, so the basement renovation timeline in Seattle should never be built around a guaranteed approval date. The more complicated the structural and occupancy changes, the more room the schedule needs for questions, revisions, and coordination between the design team and the city.
Design around the basement’s actual daylight
Seattle basements often have uneven access to natural light. One side may be tucked beneath a deep canopy of mature landscaping, while another opens toward a lower grade or a side yard. Instead of forcing every room into the same mold, let the daylight guide the program.
A room with the best window exposure can become a family room, office, or bedroom. Interior zones may be better suited to storage, a bathroom, laundry, or media use. If you are adding an egress window, its location can improve both safety and the emotional quality of the room by bringing a lower level closer to the garden.
This is also where circulation becomes important. A basement stair should not deliver everyone into the back of a sofa or directly into a utility zone. Think about the route from the main entry, the path for laundry baskets, the arrival of overnight guests, and the way a child or older family member would move through the house at night.
Plan bedrooms around egress from the beginning
A legal bedroom in a Seattle basement requires an approved egress window with minimum dimensions, a maximum sill height of 44 inches from the floor, and an exterior well with drainage. The window is therefore not a last-minute hole in the wall. It affects the room layout, exterior grading, drainage, foundation work, window-well dimensions, and sometimes the placement of furniture and radiators.
The sill-height rule is particularly easy to miss when a basement floor is being lowered. A window that works on the original slab may sit too high—or too low relative to the finished floor—after a dig-out. The design should show the relationship between the floor, the sill, the well, and the surrounding grade before construction begins.
A basement bedroom earns its place in the plan through light, air, and safe escape—not simply by fitting a bed between two walls.
Phase 3: Structural Reinforcement and Foundation Dig-Outs
The third phase is where the project becomes most visibly transformative. Framing can make a basement feel different in a matter of days, but the work behind the walls determines whether the transformation will remain durable.
For homes with adequate ceiling height and a sound slab, structural work may be limited. For low basements, however, increasing clearance often means excavating 2 to 3 feet of soil and underpinning or reinforcing existing foundations. The order of operations is critical because the foundation is carrying the house while the soil around it is being changed.
Treat a dig-out as a foundation project
A dig-out is not simply removing dirt until the room feels taller. The design team must understand:
- The depth and type of existing foundation.
- Soil conditions and bearing capacity.
- The position of footings relative to the proposed excavation.
- How underpinning will be sequenced.
- Where excavated material can be removed.
- How the new slab, drainage, insulation, and foundation assemblies will meet.
- Whether adjacent structures, retaining walls, or property conditions affect the work.
The method used will depend on the existing home and the engineer’s design. The practical point for homeowners is that the excavation and reinforcement plan should be resolved before interior finishes are selected. Structural decisions can affect door locations, stair geometry, mechanical routes, and the final finished floor elevation.
A hillside property adds another layer of care. Excavation, retaining conditions, and surface drainage are connected. The project may need to preserve the stability of soil beyond the basement wall, not merely create more room inside it.
Coordinate rough trades before closing the walls
Once the foundation and floor work are complete, the project moves into framing and rough trades. This is the moment when the basement’s future routines become physical:
- Plumbing lines define the bathroom and laundry locations.
- Electrical circuits establish where task lighting, outlets, appliances, and equipment can live.
- HVAC routes determine soffits, ceiling drops, and room proportions.
- Framing creates storage niches, closets, separations, and sound boundaries.
- Insulation and vapor-control assemblies establish the wall’s response to Seattle’s damp conditions.
The practical challenge is coordination. A duct route that seems minor on the plan can lower a hallway ceiling. A new bathroom placed far from the existing stack can require more invasive plumbing work. A mechanical room that is too tight becomes difficult to service later.
Walk the framed space before insulation and drywall. Stand where the bed, sofa, desk, or laundry machines will go. Follow the route from the stair to the bathroom. Look up at every beam and duct. This is the last phase when small adjustments are relatively visible and relatively manageable.
Preserve service access
Finished basements often hide water heaters, electrical panels, cleanouts, sump equipment, shutoff valves, and other systems that still need attention. Avoid enclosing these components behind permanent millwork or placing them in a corner with no working clearance.
Good design makes utility access feel intentional. A painted service door, a built-in cabinet with removable panels, or a well-lit mechanical zone is more graceful than pretending the infrastructure does not exist. In Seattle homes, where moisture and drainage systems may require future maintenance, accessibility is part of the renovation’s long-term value.
Phase 4: Interior Trades, Egress Compliance, and Final Inspections
The final phase is where the basement becomes legible as part of the home rather than as a construction site. It includes insulation, drywall, flooring, cabinetry, trim, paint, fixtures, and lighting—but it also includes the inspections that confirm the work matches the approved design.
Interior finishes should respond to the basement’s particular atmosphere. Materials that tolerate occasional humidity and routine wear are generally more forgiving than delicate assemblies that depend on a perfectly stable environment. Warm flooring, layered lighting, and carefully placed millwork can make a lower level welcoming without disguising its relationship to the ground.
Choose finishes that support the use
For a family room, resilient flooring and washable wall finishes may matter more than elaborate built-ins. For a guest suite, acoustic separation, a generous closet, and soft bedside lighting will shape the experience. For an ADU, kitchen ventilation, storage, bathroom access, and a clear entrance sequence become central.
Seattle’s interior design language often works best when it balances warmth with restraint: natural wood tones, textured fabrics, matte finishes, and lighting that creates a gentle canopy overhead rather than a grid of harsh recessed fixtures. The aim is not to make the basement look like it has forgotten where it is. It is to make the lower level feel connected to the rest of the property.
A basement can also gain character from the landscape outside. If an egress well or lower-level window faces a planted area, use that view deliberately. Ferns, layered ground cover, and greenery suited to the site can soften the hard edges of the well while keeping drainage and maintenance in mind. The view from a basement window is small, but it is still part of the home’s community fabric.
Verify bedrooms and stairs in their finished condition
Egress compliance should be checked with the finished floor, trim, window operation, and exterior well in place. A temporary opening during construction does not necessarily represent the final condition. The window must remain accessible and operable, the sill height must comply, and the well must support safe escape and drainage.
Stairs deserve the same attention. Once flooring thickness and finished nosings are installed, risers and clearances can change. Handrails, lighting, and the transition between the stair and the lower-level floor should be evaluated as part of the completed route, not as separate details.
Bathrooms and laundry rooms may have different allowable ceiling heights, but low clearance still affects comfort and usability. Place fixtures thoughtfully, especially where a sloped ceiling, beam, or duct reduces the sense of space.
Expect inspections to follow the work
Inspections typically correspond to phases of construction, with rough work reviewed before walls and ceilings are closed and final work reviewed after the project is complete. The exact inspection path depends on the permit and scope, but the principle is consistent: do not cover work that needs to be seen.
Keep approved plans available on site and make sure field changes are communicated through the appropriate process. Moving a wall, relocating a plumbing fixture, or changing an egress opening after approval can create a discrepancy that is much harder to resolve once finishes are installed.
The final inspection is not merely a bureaucratic finish line. It is the point at which the basement’s new use, safety features, and construction details are brought into alignment.
How to Keep the Four Phases Connected
The cleanest Seattle basement remodeling projects are not necessarily the ones with the simplest scope. They are the ones where each decision is made with the next phase in view.
Before signing off on the design, walk through these questions:
1. Does the moisture strategy address the source, not just the visible symptom?
A vapor barrier or interior finish cannot substitute for a drainage solution when water is entering from outside or accumulating beneath the slab.
2. Does every proposed habitable room meet the ceiling-height requirements after finishes are installed?
Use the finished floor and ceiling elevations, not the rough measurements from the original basement.
3. Is the bedroom egress designed as a complete system?
Confirm the window dimensions, sill height, exterior well, drainage, and access route together.
4. Has the structural work been engineered before the interior layout is finalized?
Dig-outs and underpinning can influence stairs, plumbing, floor elevation, and room proportions.
5. Does the budget include soft costs and a realistic contingency?
A $105,000 entry-level project and a $400,000-plus custom conversion are different building propositions, not competing bids for the same room.
6. Can future maintenance still happen after the basement is finished?
Leave practical access to mechanical equipment, drainage systems, cleanouts, panels, and shutoffs.
7. Does the design follow the way you move through the property?
The basement should support real routines—from wet coats and laundry to guests, quiet work, recreation, or independent living—rather than simply add labeled rooms.
A Practical Walk-Through Before Construction Begins
Before construction starts, take one final tour from the street to the lowest finished space. Notice how the property sits on its slope, where rainwater travels, which side receives daylight, and how the basement connects to the garden, driveway, alley, or neighboring homes.
Then repeat the route indoors. Descend the stairs with a laundry basket. Carry a piece of furniture through the narrowest turn. Stand inside the proposed bedroom and look toward the egress window. Imagine opening the mechanical access panel on a wet winter evening. These small tests reveal the difference between a plan that fits on paper and one that fits your life.
A Seattle basement renovation project stages itself in a logical order: understand the site, design within the building’s limits, reinforce what must be reinforced, and only then finish the rooms. When moisture, structure, code, and daily movement are resolved together, the lower level can become more than additional square footage. It can be a warm, durable part of the home—one that respects the soil beneath it while giving the household more room to live.